Thanksgiving is one of my favorite days of the year. Gathering with family and friends (or friends that
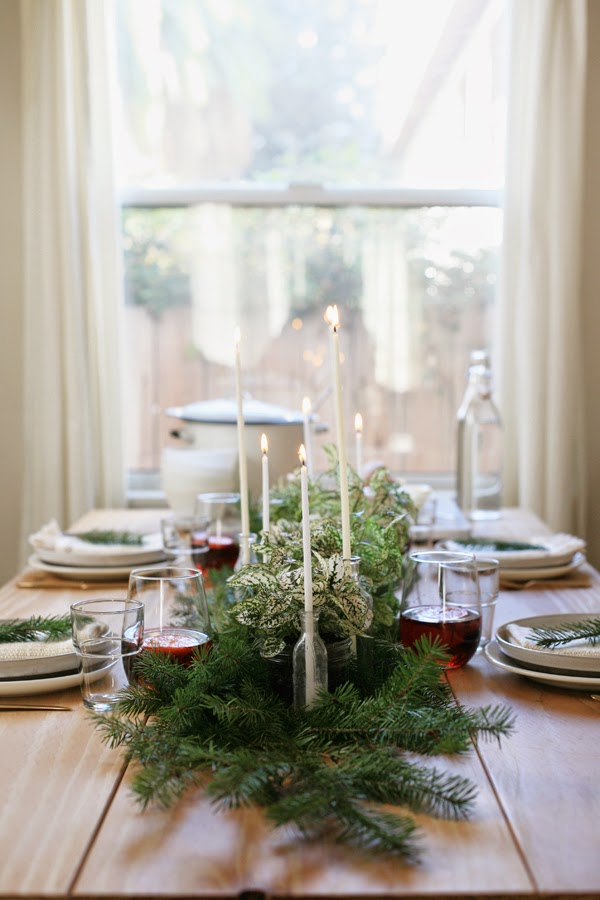
are family) around a meal that took hours of planning and prep adds up to an amazing day in my book. This year a lot of our friends are traveling for Thanksgiving though, so I used the fact I was working on some Thanksgiving recipes as an excuse to get everyone together for a little Friendsgiving- little in more ways than one.
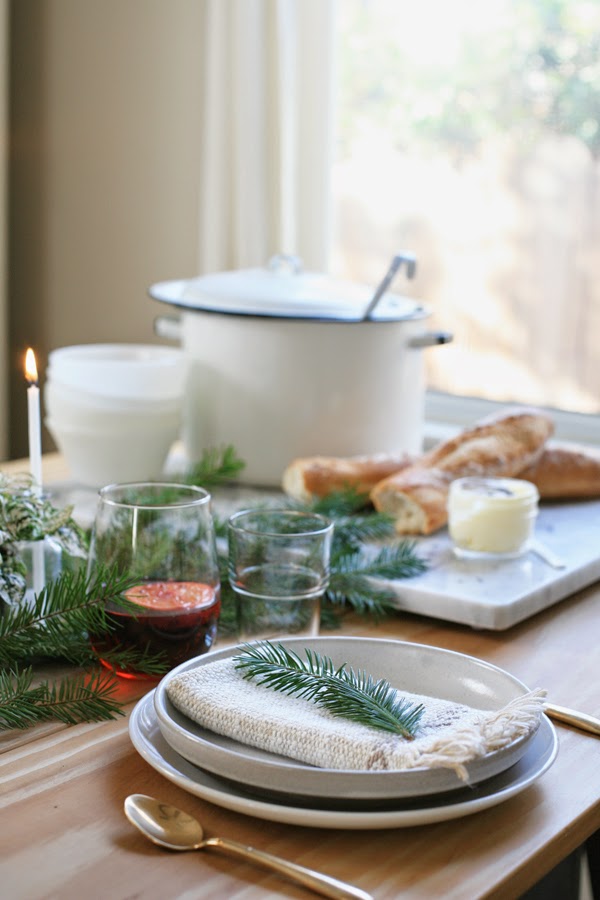
For a more relaxed get together, I started with all my favorite Thanksgiving dishes, deconstructed them a bit, and shrunk them down to finger foods. Our menu included:
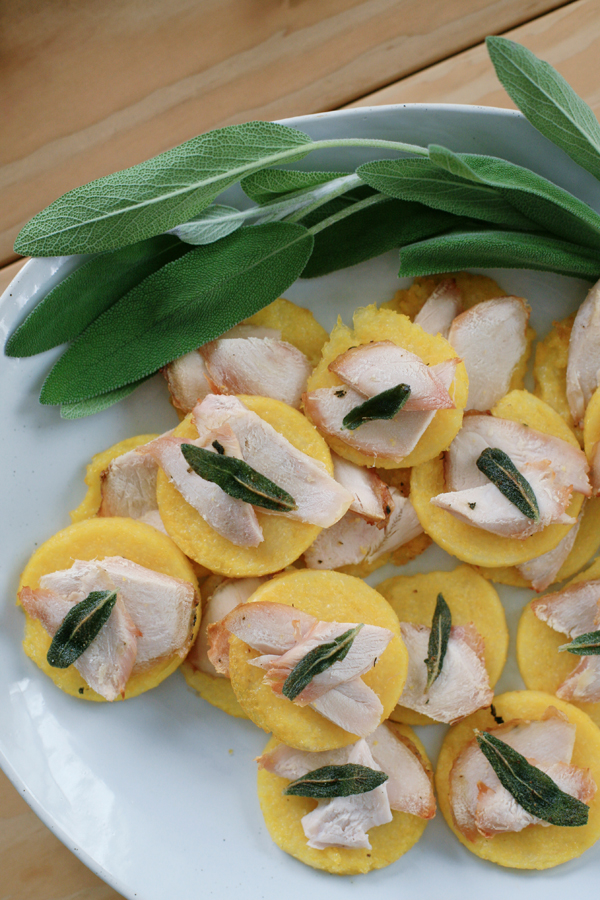
Roast Turkey-Polenta 'Sliders' with Crispy Sage
Stuffing Bites with Gravy for Dipping
Yam Kebabs
Pumpkin Tartlets with Gingerbread Crust
Spiced Cranberry Punch
The beauty of this menu is that even if you're not up for making a turkey, you can still pull this off with a store bought roasted turkey, or even just a turkey breast. I seriously enjoy prepping a roast turkey, so I went for it, but I know it can seem daunting, so if you're stressed, just skip it!
Ready for all the recipes? Everything's below, except for the
Yam Kebabs- you'll find those over on The Jungalow today!
Roast Turkey-Polenta 'Sliders' with Crispy Sage
Serves 8
Roast turkey, sliced and heated
Polenta- a store bought, pre-cooked loaf is perfect for this dish
1 Tbsp olive oil
3 Tbsp butter
Fresh sage leaves, washed
Pre-heat oven to 350°.
Slice polenta into discs, about 1/4 inch thick.
Brush olive oil onto a baking sheet, coating well.
Place polenta slices directly onto baking sheet. Bake for 15-20 minutes until polenta is firm and crisp on the outside.
While polenta is baking, prepare crispy sage by melting butter over med-low heat in a small skillet. Once butter is melted and sizzling, add sage leaves and cook until crisp- about 5 minutes. Remove sage leaves.
When polenta is done baking, top each slice with 1-2 slices of turkey and a sage leaf. Serve warm, with gravy, if desired.
Stuffing Bites
Serves 8
8 cups dry bread cubes
6 slices of bacon, cut into 1/2 inch pieces (for a vegetarian version, substitute 1/2 c melted butter)
1 cup shredded carrots
1 cup sliced mushrooms
1/2 cup diced onion
1/4 tsp salt
1/4 tsp nutmeg
1/8 tsp ground black pepper
1/2 cup minced italian parsley
1-1.5 cup turkey (or chicken) stock
Preheat oven to 350°.
In a large skillet, cook bacon until crisp. Remove from skillet and place on paper towel to drain. Remove all but 1/2 cup of the bacon drippings. Add carrots, mushrooms and onion to drippings and saute´ until tender, about 5 minutes. Stir in salt, nutmeg, pepper, and parsley.
In a large bowl, combine bacon and bread cubes; add vegetable mixture. Drizzle with enough stock to moisten bread, tossing lightly until combined. For this recipe, you want the stuffing to be slightly more moist than you would your regular stuffing recipe.
Grease a mini-muffin tin. Using a cookie scoop, or two spoons, divide stuffing into mini-muffins. Bake for 12 minutes, until dry and slightly crisp on top. Serve warm, with gravy for dipping.
*Stuffing can be baked at the same time as the polenta, if you have room in your oven. Just pull it out earlier and keep warm until polenta is done. *
Pumpkin Tartlets with Gingerbread Crust
(Adapted from
Sift and Whisk and my mom's pumpkin pie)
Serves 16, depending on tartlet pan size
Gingerbread Crust
2½ cups all-purpose flour (plus more for rolling)
3 tsp ground cinnamon
1 tsp freshly grated nutmeg
¼ tsp ground cloves
¼ tsp ground ginger
¾ tsp salt
½ cup unsalted butter, cubed and chilled
½ cup molasses
In the bowl of a food processor, pulse together flour, spices, and salt. Sprinkle in butter cubes and pulse until they are about pea sized. Add molasses and pulse until mixture comes together, forming a ball. Turn out onto plastic wrap, shape into a disc, wrap, and refrigerate for at least 1 hour or overnight.
Roll dough into a thin sheet on a lightly floured surface. Cut dough into squares (or circles if you're feeling confident) large enough to cover your tartlet pans, with about 1/2 inch overhang. Gently place dough into tartlet pan, pressing lightly to ensure crust is flush with pan sides. Run the rolling pin over the top of tartlet pan to trim dough, removing any dough that sticks to the outside. Poke the crusts all over the bottom with a fork. Freeze for 30 minutes. Meanwhile, preheat oven to 350°F.
Place the tart pans on a baking sheet. Press foil squares, shiny side down, tightly against the crust. Fill with dry beans or pie weights. Bake for 10 minutes, remove foil and beans, then bake for another 2 minutes uncovered. Cool to room temperature on a wire rack.
Pumpkin Filling
3/4 cup sugar
1/2 tsp salt
2 tsp ground cinnamon
1 tsp ground ginger
1/2 tsp ground cloves
2 large eggs
1 (15 oz) can pumpkin puree
1 (12 oz) can evaporated milk
In a large bowl, beat eggs; stir in pumpkin, sugar, and spices until combined. Gradually mix in evaporated milk until smooth and combined.
Once tart crusts are cool, return to baking sheet. Fill each with pumpkin mixture until full to the top, without spilling over. Bake at 350° for 25-30 minutes, or until set (filling will still jiggle slightly). Place on cooling rack until room temp. Transfer tartlets to fridge, covered, if you prefer your pumpkin 'pie' cold.
Serve with a dollop of whipped cream and freshly grated nutmeg.
Spiced (and Spiked) Cranberry Punch
Serves 16
1 32 oz jar pure cranberry juice
3 3 inch cinnamon sticks
2 tsp whole cloves
3 cardamom pods
Zest of 1 orange, in large strips
8 bottles ginger beer
4-6 orange slices
Whole cranberries to garnish
Bourbon to taste, if desired
In a small saucepan, bring 2 cups juice, spices, and orange zest to a boil, reduce heat and simmer for 15 minutes. Remove from heat and strain out orange zest, cardamom pods and cloves. Cool spiced juice to room temp, then add to the rest of the juice. Refrigerate juice until chilled. Just before serving, mix with ginger beer in a punch bowl (or a big pot, like I did). Float orange slices and cinnamon sticks on top. Thread whole cranberries onto a cocktail pick to garnish each glass. Let guests help themselves to punch, and add bourbon to their taste.
Happy Friendsgiving! (And a big thank you to all my real life friends who let me photograph them for this post).
Original recipes, styling, and photography by Danae Horst for Gather and Hunt.